How to simply show image dimensions in Finder on macOS
A simple and time-saving trick to view image dimensions and resolution for any folder in the Finder on macOS.

If you're using the Finder on macOS and want to see the dimensions of an image right away, there's a simple trick to making this information visible outside the default Pictures folder. It's a quick hack that I honestly can't believe I haven't known about for decades.
TL:DR;
- Rename folder (e.g.
Cat) and addPicturesat first place of the name. E.g.Pictures Cat - Go into folder, choose
list viewand addDimensionas column. - Rename folder back to origin. E.g.
Cat
Step-by-Step guide
Rename the folder from xyz to Pictures xyz
Select the folder containing the images whose dimensions you want to see. Right-click on the folder name and select Rename. Add the word Pictures (with capital P) to the beginning of the folder name – for example: change Vacation Photos to Pictures Vacation Photos
Open the folder and adjust columns to display Dimensions
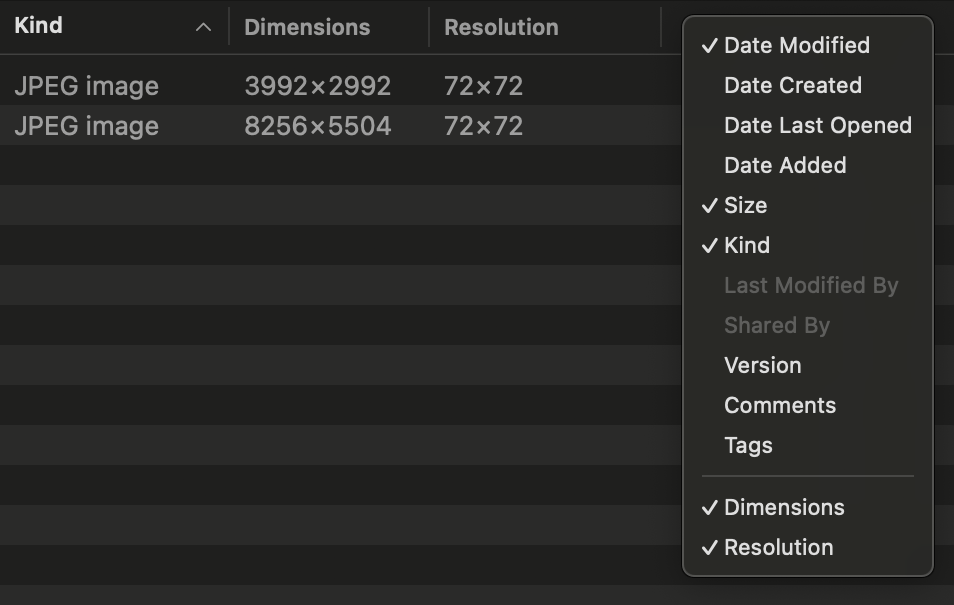
Open the renamed folder. Select List mode as the view for the folder. Right-click on the column header in the Finder window (where it says Name, Date, Size, etc.). A drop-down menu will appear with various options. Scroll through the list and tick Dimensions and/or Resolution, depending on what details you want to see.
Et voilà.

Rename the folder back
Once you have selected the columns you want, you can rename the folder back to its original name. Right-click it again, select Rename, and remove the added `Pictures` from the name. The Dimension / Resolution column will remain.
Done.
By doing this, the Finder temporarily recognises the folder as a Pictures directory, allowing it to display image-specific details. Once enabled, the columns remain visible even if the folder is renamed again.
This simple trick can significantly improve workflow, especially for photographers, designers or anyone who works with images a lot. Instead of opening each file individually to check its dimensions, you can now see all the relevant details at a glance right in the Finder.
Give it a try. It makes managing your image files on the Mac so much easier!